
DIY Camera Stabilizer Build - The Stabilizer Base Plate

- Its the mounting point for your Counter-Weights
- If designed it can be used as a stand for smaller rigs
- It controls the inertia of the stabilizer - Key factor
Material
 Anything from wood to plastic to metal works as long as it's strong enough. It needs to be able to support the counter-weights, and if you plan on using it as a stand keep the stabilizer upright. We prefer to use ABS plastic sheet because it's both strong and light weight. If you go with a 3/8" thick sheet like we offer in our DIY-Garage it gives you the ability to counter-sink screws in the plate giving you a smooth bottom, so no need for those stick on feet that always fall off. Simple hand tools work with most plastics so its a great option for the DIY crowd. If you have access to more advanced tools a thinner aluminum sheet is great. Keep in mind that the weight of the base plate factors in as counter-weighting, which can be a problem if you have a fixed main tube height design(we'll cover this later on).
Design
Unless you're trying to mount an LCD screen or other gear to the base of the stabilizer we recommend your design have a symmetrical shape, doing so will make balancing your rig easier in the long run.
The next thing to ask yourself is how far out should I go? This is a tricky thing to answer because it really comes down to personal preference, and how, and what you plan to film.
- If you're the type to film those slow walks in the park, the farther the better.
- If you're looking for fast action shots with quick pans, pull the weight closer to the main tube.
- If you're looking to do a little of both, consider making it adjustable.

If you're looking to keep things simple, we've found for smaller handheld rigs selecting a mounting point for your counter-weights that's 3-6inches away from the center of the plate works well.
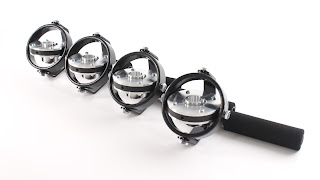
Tubular design

I'm going to touch on this briefly because we haven't had time to really extensively test this option. You'll notice that some of the larger commercial rigs use a tubular design for their base plates. One of the key reasons is the ability to use lighter materials like carbon fiber, plus its stronger than a similar flat sheet of metal. There are however a few down sides the DIY'er should consider. First off it's typically more difficult to mount both to the stabilizer and the counter-weights. Drilling in to the side of a tube or making a special clamping mount can be a little tricky. The other is shy of an +, H or X configuration or some special mounts it typically can't be used as a stand for the stabilizer. That's not to say it's not worth considering, because like we covered in the previous section, the farther out you can place the weight from center, the more it affects inertia. 
For the basis of this series we're going to assume you're looking for something more than just a few pieces of PVC pipe glued together, otherwise why would you have read this whole thing?

Comments
Post a Comment